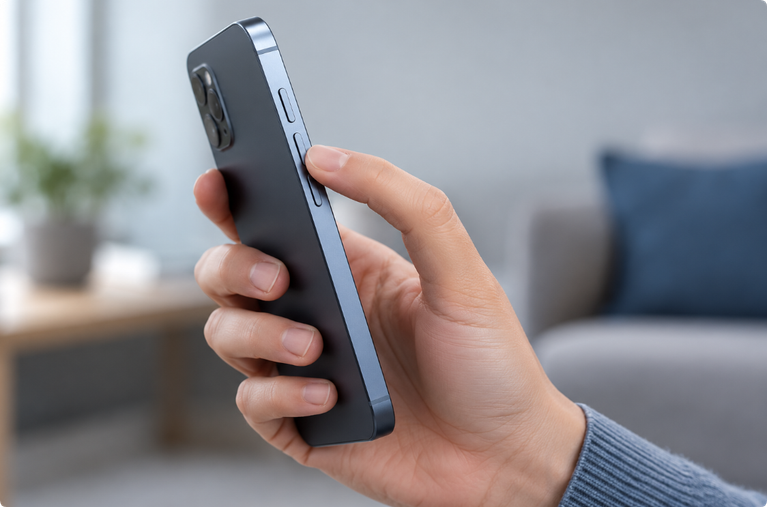

A phone collects fingerprints, skin oils, pocket lint, dust, and debris during normal use. Safe phone cleaning can improve visibility, keep buttons and openings clear, and prevent a dirty case from transferring debris back to the device. The wrong method, however, can scratch coatings, push dirt into ports, or introduce moisture where it does not belong.
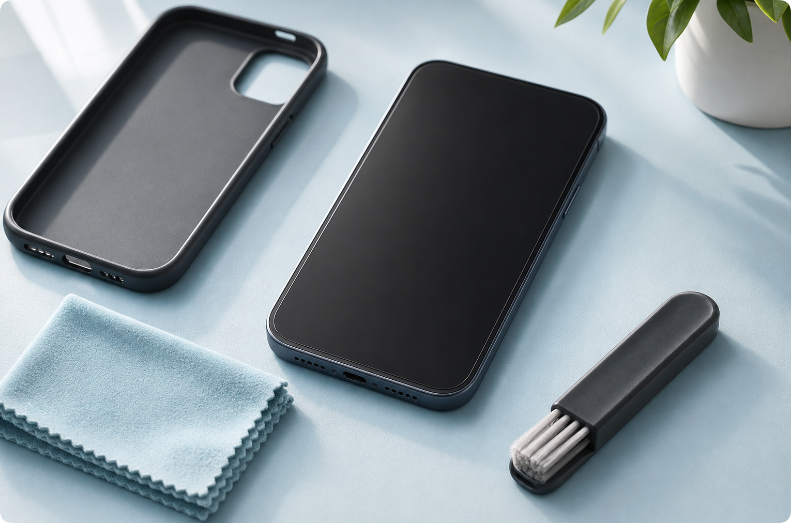
The safest approach is simple: disconnect power, remove the case, use a soft lint-free cloth, keep moisture away from openings, and follow the cleaning instructions for your exact phone model.
Quick Phone-Cleaning Checklist
- Unplug cables and remove wired accessories.
- Turn the phone off if practical.
- Remove the case and clean it separately.
- Wipe the screen and exterior with a clean, soft, lint-free cloth.
- Inspect speakers, microphones, cameras, buttons, and ports in bright light.
- Remove only loose surface dust using manufacturer-approved methods.
- Keep liquids, sharp objects, compressed air, and adhesive putty out of openings.
- Let every cleaned item dry completely before reassembly or charging.
Apple’s current product-cleaning guidance recommends disconnecting cables, avoiding moisture in openings, and not using compressed air. Other manufacturers may give different instructions, so check the official support page for your exact model before using any cleaning product.
What You Need
For routine exterior cleaning, start with the least aggressive materials:
- a clean, soft, lint-free microfiber cloth;
- good lighting;
- a clean, dry, very soft brush only when the manufacturer permits it;
- a separate cloth for the phone case;
- the official cleaning instructions for the phone and case materials.
You usually do not need a special phone-cleaning tool for routine fingerprints and loose exterior dust. More tools create more opportunities to scratch a surface or push debris inward.
Step 1: Disconnect Power and Remove the Case
Unplug the charger, headphones, adapters, and other accessories. Remove the case so you can see where dirt has collected along the frame, buttons, camera area, and speaker openings.
A case can also be the source of a sound or button problem. A shifted edge may partially cover a speaker, microphone, or switch. Test fit and alignment before assuming the phone hardware needs cleaning or repair.
Step 2: Clean the Screen and Exterior
Use a clean microfiber cloth and light pressure. Wipe in broad strokes rather than grinding a visible particle across the screen. If a particle does not move easily, check the manufacturer’s instructions before adding moisture or another product.
Do not spray cleaner directly onto the phone. A product that is acceptable for one surface may be unsafe for a coating, adhesive, grille, or connector. Never allow liquid to pool along screen edges, buttons, camera rings, or openings.
Step 3: Clean the Phone Case Separately
Cases use different materials, including silicone, plastic, leather, fabric, and composites. Cleaning instructions are not interchangeable.
Remove the case before cleaning it. Follow the case manufacturer’s directions, then let it dry completely. Check the inside for trapped grit that could scratch the phone. Do not reinstall a damp case, because it can hold moisture against the device.
Step 4: Remove Dust From the Speaker Exterior
Phone speakers are covered by fine mesh or narrow openings. The goal is to remove loose material from the outside, not to push through the grille.
Use bright light to inspect the top earpiece and bottom speaker area. If your manufacturer permits it, move a clean, dry, very soft brush lightly across the surface. Do not insert bristles deeply or use pins, toothpicks, metal tools, or sticky putty.
For a detailed speaker-only procedure, follow the site’s safe phone-speaker cleaning guide.
If the speaker has no sound at all, dust may not be the cause. Check audio routing and software using the phone speaker no-sound guide before repeating physical cleaning.
Step 5: Inspect the Charging Port Without Probing It
Pocket lint can collect near a charging port, but the contacts inside are delicate. Turn the phone off, use good lighting, and inspect the opening without inserting an object.
Do not scrape contacts with a pin or metal tool. Do not pour alcohol or cleaner into the port. Do not use compressed air unless the manufacturer explicitly instructs it for that model. If charging is unreliable and visible debris cannot be removed through approved exterior steps, qualified service is safer than probing the connector.
If a liquid warning appears, disconnect the cable and follow the manufacturer’s drying instructions instead of treating the problem as ordinary dirt.
Step 6: Clean Around Cameras and Buttons
Use a clean section of the microfiber cloth around camera glass, button edges, and seams. A fingerprint on the camera cover can make photos look hazy, while dirt around a case opening can affect button movement.
Avoid forcing cloth fibers into gaps. Persistent haze inside a camera lens is not an exterior cleaning problem and can be a sign of moisture or internal damage.
Dust, Dirt, and Moisture Need Different Methods
| What you see or hear | Likely issue | Appropriate response |
|---|---|---|
| Loose dust on the screen or case | Surface debris | Lift it gently with a clean microfiber cloth |
| Lint across a speaker grille | Exterior obstruction | Use manufacturer-approved surface cleaning |
| Muffled sound after a splash | Moisture near the speaker | Disconnect power, dry externally, and use the wet-speaker guide |
| Sticky residue near an opening | Contaminated liquid or product buildup | Do not push it inward; seek device-specific guidance |
| No sound, charging, or display response | Software or hardware issue | Stop cleaning and troubleshoot or seek service |
A sound-cleaning tool may move a small water droplet near a working speaker, but it cannot eliminate dry dust or clean the rest of the phone.
Cleaning Methods That Can Cause Damage
Spraying the Phone Directly
Spray can run into speakers, microphones, seams, and the charging connector. Apply only a manufacturer-approved method, and never assume water resistance makes cleaning liquid harmless.
Using Pins, Toothpicks, or Metal Tools
These objects can damage grille mesh, microphone membranes, connector contacts, and seals. They can also push debris deeper.
Using Compressed Air
High-pressure air can move particles or moisture farther inside. Apple specifically advises against compressed air in its general cleaning guidance.
Applying Heat
Hair dryers, heaters, and ovens can harm batteries, coatings, seals, and adhesives. Heat is not an appropriate shortcut for cleaning or drying a phone.
Using Adhesive Putty Without Official Guidance
Putty may leave residue in fine openings. A method shown on one phone design may be unsafe on another.
Opening the Phone for Routine Cleaning
Modern phones contain glued components, fragile cables, and lithium-ion batteries. Opening the device can create a safety risk and affect its seals. Routine exterior dust does not justify internal DIY disassembly.
How Often Should You Clean Your Phone?
There is no universal schedule. Clean visible fingerprints and debris when needed, and inspect the case periodically if the phone spends time in dusty pockets, bags, workshops, kitchens, or outdoor environments.
Frequent aggressive cleaning can be worse than occasional gentle cleaning. Use the least force and fewest products necessary.
After Cleaning: Test the Phone
Before replacing the case:
- Confirm the phone and case are dry.
- Inspect the speaker, microphone, and charging openings.
- Reinstall the case without covering openings.
- Turn on the phone and test buttons, cameras, charging, calls, and media.
- Begin speaker testing at a moderate volume.
If audio remains muffled after exterior dust is removed, consider moisture, residue, routing, or hardware damage rather than cleaning the same area repeatedly.
Frequently Asked Questions
What is the safest way to clean up my phone?
Disconnect cables, remove the case, and use a clean soft lint-free cloth on the exterior. Keep moisture out of openings and follow the official instructions for the exact phone and case materials.
How do I get rid of dust in a phone speaker?
Remove only loose dust from the exterior grille using manufacturer-approved methods. Do not insert tools through the mesh. See the dedicated phone-speaker cleaning guide for detailed steps.
Can I use water to clean my phone?
Do not assume a water-resistant phone can be rinsed or sprayed. Follow the manufacturer’s cleaning instructions. Keep moisture away from openings and never charge through a wet connector.
Does a speaker-cleaner sound remove dirt?
No. Sound may move a small droplet close to the speaker grille, but it does not vacuum dust, dissolve residue, or clean the screen, case, or charging port.
Can cleaning improve phone audio?
It can restore normal sound when a case or exterior debris blocks the grille. It cannot repair a damaged speaker or change the phone’s original audio capability.
Editorial Note
This article provides general exterior-cleaning information. Phone materials and manufacturer instructions vary. Official guidance for your exact model takes priority.