Your iPhone speakers just got wet. Water is trapped inside making everything sound muffled. Phone calls are hard to hear. Music plays at half volume. You need a fast, effective solution right now. Fortunately, ejecting water from iPhone speakers takes only 60 seconds when you use the right method.
Why Water Gets Trapped in iPhone Speakers
iPhone speakers feature precision-engineered mesh grilles designed to deliver crystal-clear audio. These microscopic openings allow sound waves to pass through while blocking dust and debris. However, these same protective grilles become perfect water traps when exposed to moisture.
Water molecules bond together through surface tension. This natural phenomenon causes droplets to cling to the speaker mesh rather than simply flowing out. Moreover, the speaker chamber’s sealed design prevents air circulation that might otherwise facilitate evaporation. Consequently, water sits trapped inside the speaker cavity indefinitely without intervention.
Even water-resistant iPhones aren’t immune to this problem. Your iPhone 13, 14, or 15 might have an impressive IP68 rating, but that doesn’t prevent water from entering the speaker openings. These openings must remain unobstructed for sound output. Therefore, every iPhone—regardless of water resistance rating—needs water ejection after exposure to moisture.
For instance, swimming pool water, rain showers, accidental sink drops, or even bathroom steam can introduce moisture into iPhone speakers. The longer water remains trapped, the higher the risk of corrosion and permanent damage. Understanding this urgency helps you respond appropriately when water exposure occurs.
The Fastest Method: Using waterejectsound.com
Complete Step-by-Step Process
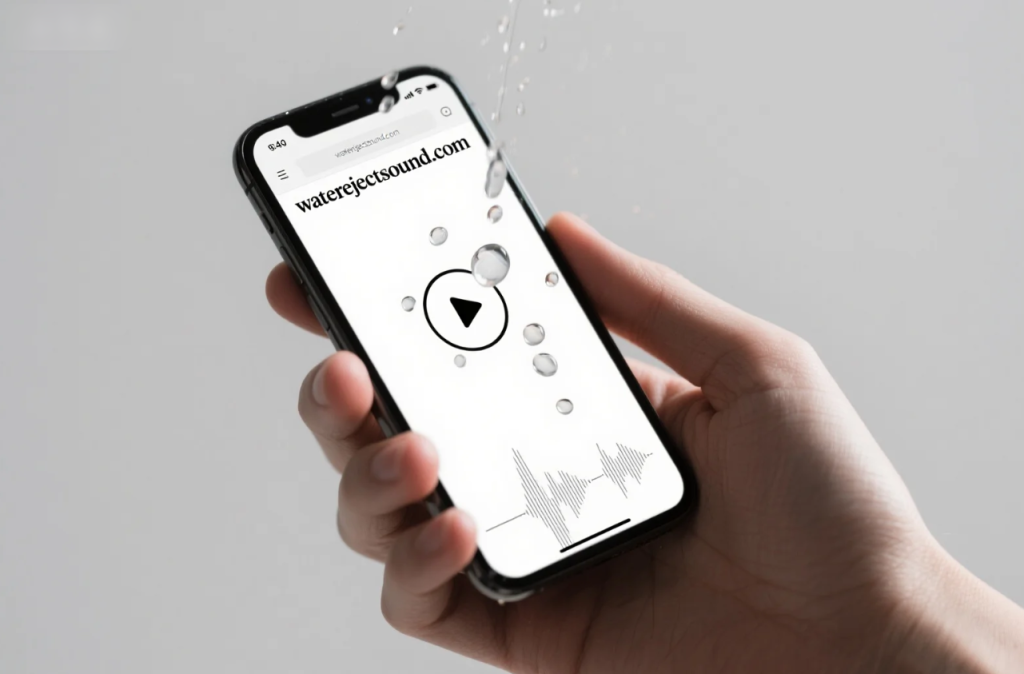
Visit waterejectsound.com directly from your iPhone’s Safari browser. This free online tool requires zero downloads, no app installations, and no complicated shortcuts. The website loads instantly and presents a user-friendly interface specifically designed for emergency water removal situations.
Before starting the ejection process, prepare your iPhone properly. Remove any protective case that might be trapping additional water against the device. Cases can create pockets where moisture accumulates. Additionally, wipe all exterior surfaces with a clean, lint-free cloth to remove visible water droplets.
Check both speaker locations on your iPhone. Modern iPhones typically have two speakers—the bottom speaker near the charging port and the top speaker that doubles as the earpiece. Both locations can trap water and require individual treatment. Therefore, visual inspection helps you identify which speakers need attention.
Set your iPhone volume to absolute maximum using the volume up button. This step is critically important for success. Lower volume settings produce weaker speaker membrane vibrations that won’t generate sufficient force to eject water. Maximum volume creates the intense vibrations necessary for effective water removal.
Hold your iPhone with the bottom speaker facing downward at approximately a 45-degree angle. This specific positioning serves two purposes. First, it allows gravity to assist the ejection process by pulling dislodged water away from the device. Second, it prevents water from simply resettling back into the speaker chamber.
Tap the play button on waterejectsound.com. You’ll immediately hear a distinctive pulsing tone. This isn’t random noise—it’s a carefully calibrated sequence of frequencies between 165Hz and 400Hz. These specific frequencies create optimal speaker membrane vibration for water displacement.
Watch the speaker grille closely during the 60-second cycle. Within the first 15-30 seconds, you should observe tiny water droplets emerging from the mesh openings. This visual confirmation indicates the process is working effectively. The droplets will fall away from your iPhone due to the downward angle you’re maintaining.
Let the complete 60-second cycle finish without interruption. Stopping early reduces effectiveness because water removal happens progressively throughout the entire duration. After the first cycle completes, wait 30 seconds before starting the next cycle. This pause allows water that was loosened but not expelled to migrate toward the speaker opening.
Repeat this process 3-4 times for the bottom speaker. Then rotate your iPhone 180 degrees to treat the top earpiece speaker. Run another 3-4 cycles with the earpiece facing downward. Therefore, comprehensive treatment addresses both speaker locations systematically.
Why This Method Works Best
Waterejectsound.com uses multiple frequencies in sequence rather than a single tone. Different droplet sizes respond better to different frequencies. Larger water droplets need lower frequencies around 165Hz for sustained, powerful vibrations. Meanwhile, smaller droplets trapped in mesh openings respond better to higher frequencies near 400Hz that create rapid oscillations.
The tool’s frequency sweep approach ensures comprehensive water removal regardless of droplet size distribution. This scientific methodology explains why waterejectsound.com outperforms random YouTube audio files or simple tone generators. Professional acoustic engineering makes the difference between partial and complete water removal.
Moreover, web-based tools offer universal compatibility. Whether you own an iPhone 11, 12, 13, 14, 15, or even older models, the same tool works perfectly. You don’t need model-specific apps or configurations. Additionally, web tools receive automatic updates, ensuring you always use the most effective frequency algorithms without manual intervention.
The convenience factor matters tremendously during emergencies. When your iPhone gets wet, you don’t have time to research apps, read reviews, or wait for downloads. Simply typing waterejectsound.com into Safari provides instant access to professional-grade water ejection. Consequently, faster response time leads to better water removal outcomes.
Alternative Method: Siri Shortcuts
Creating Your Own Water Eject Shortcut
iPhone users running iOS 14 or later can create custom Siri Shortcuts for water ejection. Open the Shortcuts app pre-installed on your iPhone. If you’ve deleted it, download it again from the App Store at no cost.
Tap the plus icon in the top right corner to create a new shortcut. This opens the shortcut builder interface. Search for “Set Volume” in the actions search bar and add this action to your shortcut. Configure it to set volume to 100%.
Next, search for “Play Sound” and add this action below the volume control. Here’s where the process becomes complicated. You need to provide an audio file containing the correct water eject frequencies. Many users struggle at this step because finding or creating appropriate audio files requires technical knowledge.
Some websites offer downloadable water eject audio files, but file quality varies significantly. Poor quality files won’t create sufficient vibration for effective water removal. Moreover, importing audio files to your iPhone adds extra steps to an already complex process.
After adding the audio file, name your shortcut something memorable like “Water Eject” or “Dry Speaker.” You can then trigger this shortcut by asking Siri or tapping it in the Shortcuts app. However, this method requires significant setup time compared to simply visiting waterejectsound.com.
Shortcut Limitations
Shortcuts require iOS 14 or newer. iPhone users with older iOS versions can’t use this method at all. Additionally, shortcuts need periodic updating when iOS versions change or when better audio files become available. This maintenance burden makes shortcuts less convenient than web-based solutions.
The audio file quality issue poses serious problems. Many downloadable files use incorrect frequencies or insufficient amplitude. These suboptimal files produce weak results that frustrate users. In contrast, waterejectsound.com maintains professional audio engineering standards consistently. Therefore, web tools deliver more reliable results than user-created shortcuts.
Understanding iPhone Speaker Locations
Different iPhone models have varying speaker configurations. Knowing your specific model’s speaker layout ensures you treat all water-exposed areas properly.
Bottom Speaker Configuration
All iPhones have a primary speaker near the bottom edge adjacent to the charging port. On Lightning port models (iPhone 5 through iPhone 14), this speaker sits to the right of the port. On USB-C models (iPhone 15 and newer), the speaker location varies slightly but remains on the bottom edge.
This bottom speaker handles most audio output including music, videos, speakerphone calls, and alerts. It’s also the most vulnerable to water exposure because of its position. Setting your iPhone on wet surfaces, accidental spills, or rain exposure typically affects this speaker first. Therefore, the bottom speaker requires primary attention during water ejection treatment.
Earpiece Speaker Considerations
The earpiece at the top of your iPhone serves dual purposes. It functions as the speaker during phone calls and as a second stereo speaker for media playback. This speaker sits in the narrow bezel above the display screen.
Water can enter the earpiece from various scenarios. Talking on the phone in rain, using your iPhone while sweating, or getting caught in a shower all introduce moisture to this location. Additionally, if you submerge your iPhone accidentally, water enters both top and bottom speakers simultaneously.
Treating the earpiece requires holding your iPhone upside down during water eject cycles. This positioning allows gravity to pull water downward and away from the device. Many people forget to treat the earpiece, focusing only on the bottom speaker. Consequently, they experience continued audio problems despite treating the more obvious bottom speaker location.
What NOT to Do When iPhone Speakers Get Wet
Understanding harmful practices prevents you from making water damage worse. Many well-intentioned actions actually increase damage risk rather than helping.
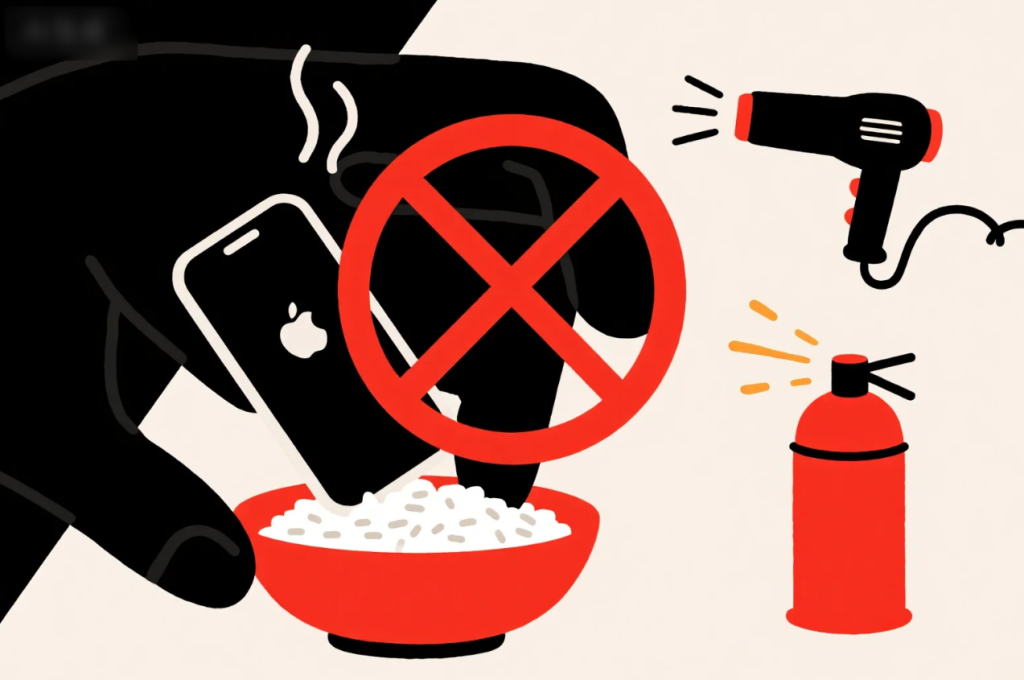
Never Use Rice
The rice myth refuses to die despite overwhelming evidence against it. Rice doesn’t actively extract water from electronic devices. It merely absorbs ambient humidity in the surrounding air. Water trapped inside your iPhone speaker chamber needs mechanical force to dislodge—passive absorption doesn’t work.
Furthermore, rice dust creates additional problems. Microscopic rice particles enter your iPhone’s ports and speaker grilles. These particles mix with moisture to form a paste-like substance that’s harder to remove than water alone. Additionally, rice dust can scratch internal components if it penetrates deeply enough.
Scientific testing has proven that rice performs no better than simply leaving devices in open air. In fact, studies show rice-dried devices often have more residue and debris than air-dried devices. Therefore, skip the rice entirely and use proven water ejection methods instead.
Avoid All Heat Sources
Hair dryers seem like logical solutions for wet electronics. However, concentrated heat causes serious damage to iPhone components. Excessive heat warps plastic housing, melts internal adhesives, and can even cause battery swelling or rupture.
The LCD screen is particularly vulnerable to heat damage. High temperatures create dead pixels, discoloration, or complete screen failure. Replacing an iPhone screen costs $129-$379 depending on your model. Consequently, hair dryer damage often exceeds the cost of proper water damage repair.
Direct sunlight poses similar risks. Leaving your iPhone on a sunny windowsill or dashboard creates temperatures exceeding 140°F (60°C). These extreme temperatures damage batteries permanently and can warp the device chassis. Moreover, heat doesn’t actually remove water effectively—it just speeds evaporation slightly while creating severe damage risks.
Don’t Charge Wet iPhones
Plugging a wet iPhone into power creates immediate short circuit risks. Water conducts electricity, allowing current to flow where it shouldn’t. This can damage charging circuits, battery management systems, and even the main logic board.
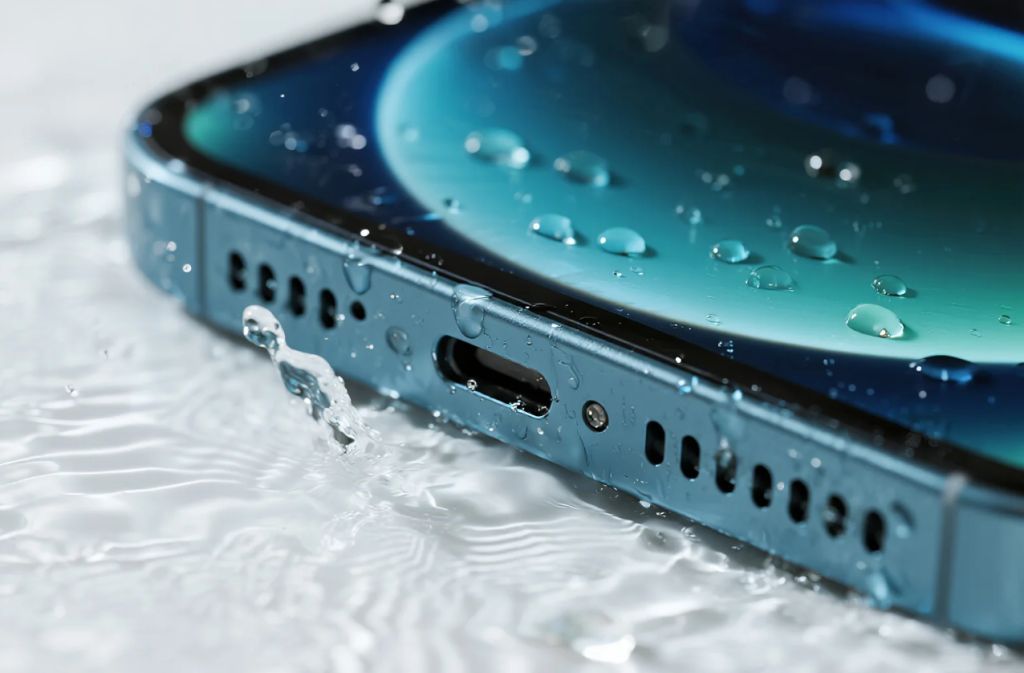
Lightning and USB-C ports retain moisture longer than exposed speakers. The port’s recessed design traps water effectively. Even if speakers sound clear, ports might still contain moisture. Therefore, waiting 24 hours after water ejection before charging is the safest approach.
Wireless charging seems safer because it eliminates physical port contact. However, internal moisture still poses risks even with wireless charging. Water inside your iPhone can create shorts in circuits near the wireless charging coil. Consequently, all charging methods require waiting until the device is completely dry internally.
Testing Water Ejection Effectiveness
Systematic testing confirms whether water removal was successful. Don’t assume success without verification—thorough testing reveals any remaining moisture issues.
Audio Quality Assessment
Start testing with spoken word content like podcasts or audiobooks. Human speech contains frequencies across the entire audible spectrum, making it ideal for detecting distortion. Play a podcast you’re familiar with and listen carefully for any muffling, crackling, or unusual sounds.
Clear, undistorted dialogue indicates successful water removal. The voices should sound exactly as they did before water exposure. However, if speech sounds muffled like someone talking through fabric, moisture remains in the speaker. This comparison test provides immediate feedback on treatment effectiveness.
Progress to music testing after verifying speech clarity. Play songs with diverse instruments covering bass, midrange, and treble frequencies. Bass drums and guitars test low-frequency response. Vocals and pianos test midrange. Cymbals and high-hats test treble. All ranges should sound balanced and clear.
Test at multiple volume levels from 25% to 100%. Some moisture issues only become apparent at higher volumes. Crackling that appears only above 80% volume indicates residual water that needs additional treatment. Therefore, comprehensive volume testing reveals problems that low-volume listening might miss.
Physical Inspection Techniques
Examine both speaker grilles under strong lighting. Direct sunlight or a bright LED flashlight works well. Look for visible moisture, water droplets, or a wet sheen on the mesh. Any visible water indicates incomplete treatment requiring additional cycles.
Use the flashlight at an angle rather than straight-on. Angled lighting reveals moisture that direct lighting misses. The water creates reflective spots that become obvious with proper illumination. Moreover, this technique helps you see moisture in the tiny mesh openings that appear dry from other angles.
Feel around speakers and ports with clean, dry fingers. Sometimes moisture migrates during treatment to adjacent areas. The metal frame around speakers might feel slightly cool if water is evaporating nearby. Additionally, you might feel dampness that isn’t visible. Therefore, tactile inspection supplements visual examination effectively.
Understanding iPhone Water Resistance
Modern iPhones have impressive water resistance ratings, but understanding the specifics prevents false confidence and misuse.
IP Rating Breakdown
iPhone 13, 14, and 15 models carry IP68 ratings under IEC standard 60529. The “6” means complete dust protection—no particles can enter. The “8” indicates water resistance to specific depths and durations. For these models, IP68 means 6 meters depth for 30 minutes maximum.
However, these ratings apply only to fresh water under controlled laboratory conditions. Real-world scenarios differ dramatically from lab testing. Saltwater corrodes more aggressively than fresh water. Chlorinated pool water contains chemicals that attack seals and gaskets. Soapy water from sinks can leave residue that traps additional moisture.
Moreover, water resistance degrades over time. Every drop, impact, or temperature fluctuation weakens protective seals. A two-year-old iPhone 14 has significantly less water resistance than when it was new. Charging port wear, button degradation, and seal aging all reduce protection. Consequently, treating every iPhone as vulnerable to water damage represents the safest approach.
What Water Resistance Doesn’t Cover
Apple’s warranty explicitly excludes all liquid damage regardless of IP rating. Even if your iPhone 15 has IP68 protection, water damage voids your warranty. Repair costs come entirely from your pocket unless you purchased AppleCare+ with accidental damage coverage.
AppleCare+ reduces but doesn’t eliminate water damage costs. You’ll pay a $99 service fee for accidental damage claims. Additionally, AppleCare+ limits you to two incidents per year. Exceeding this limit means paying full out-of-warranty prices. Therefore, preventing water damage through quick ejection saves money compared to relying on insurance coverage.
Water resistance certification doesn’t account for all water sources. High-pressure water like shower jets can force moisture past seals rated for static submersion. Hot water causes seal expansion that reduces effectiveness. Detergent solutions change surface tension allowing water to penetrate more easily. Consequently, IP ratings provide guidelines but not guarantees across all scenarios.
Advanced Troubleshooting for Persistent Water
Sometimes standard water eject cycles don’t completely resolve moisture issues. Advanced techniques address stubborn water that resists initial treatment.
Extended Treatment Protocol
For severe water exposure, implement an extended treatment schedule. Run water eject cycles every 30 minutes for the first three hours after exposure. This frequent repetition addresses water that slowly migrates from deeper inside the device toward speakers.
Between cycles, position your iPhone speaker-down on a clean, absorbent towel. Microfiber cloths work excellently because they wick moisture effectively without leaving lint. This positioning encourages gravity-assisted drainage during rest periods. Additionally, the towel absorbs any water that emerges between active treatment cycles.
After three hours, reduce frequency to every 2-3 hours for the remainder of the day. This tapering approach ensures thorough removal while allowing adequate drying time. Run a final verification cycle after 24 hours to confirm complete water elimination. Therefore, this systematic protocol maximizes effectiveness for severe cases.
Environmental Optimization
Place your iPhone in a warm, dry environment between treatment cycles. Aim for room temperature around 70-75°F (21-24°C). This moderate warmth accelerates evaporation without risking heat damage. Avoid cold environments that slow evaporation and can cause condensation.
Use a small fan to improve air circulation around your iPhone. Don’t blow air directly at the device—simply improve room air movement. This gentle circulation helps carry away moisture that reaches the surface through evaporation. Moreover, moving air prevents moisture from redepositing on the device surface.
Dehumidifiers work excellently for severe cases. These devices actively remove moisture from room air, accelerating evaporation from your iPhone. Position your device near but not directly against the dehumidifier outlet. Consequently, environmental control supplements active water ejection for optimal results.
Preventive Maintenance Strategies
Regular maintenance prevents water accumulation before problems develop. Establishing good habits protects your iPhone investment long-term.
Monthly Cleaning Cycles
Visit waterejectsound.com monthly for preventive speaker cleaning even without obvious water exposure. Environmental humidity, bathroom steam, and even breath moisture during phone calls introduce microscopic water over time. Monthly ejection cycles clear this accumulated moisture before it causes audible problems.
Think of monthly maintenance like changing car oil or brushing teeth. Preventive care costs nothing but prevents expensive problems later. Moreover, regular cleaning maintains optimal speaker performance throughout your iPhone’s lifespan. Users who implement monthly routines report consistently better audio quality compared to those who never perform maintenance.
Seasonal changes require extra attention. Summer humidity and winter condensation both affect iPhone speakers. Increase cleaning frequency to bi-weekly during summer months if you live in humid climates. Similarly, winter indoor heating creates dry air that cracks seals, requiring more frequent checks. Therefore, adapting maintenance schedules to seasonal conditions optimizes protection.
Activity-Based Prevention
Different activities create varying water exposure risks. Gym workouts generate sweat that’s actually more damaging than pure water. Sweat contains salt, minerals, and oils that corrode electronics aggressively. Run water eject cycles immediately after every workout before sweat dries and leaves residue.
Swimming and beach activities obviously present high water exposure. Even water-resistant iPhones benefit from ejection cycles after swimming. Chlorine and salt remain in speakers after water evaporates, causing gradual damage. Therefore, proactive cleaning after aquatic activities prevents cumulative corrosion.
Outdoor activities in rain or snow require attention too. Many people don’t realize that snow melts into water when it contacts warm phones. Melted snow enters speakers just like rain. Check weather forecasts and bookmark waterejectsound.com for instant access during outdoor adventures. Consequently, preparation enables quick response when unexpected exposure occurs.
When Professional Help Becomes Necessary
Most water exposure cases resolve completely with proper DIY treatment. However, certain warning signs indicate professional assessment is needed.
Damage Indicators
Complete audio failure after multiple ejection attempts suggests internal speaker damage. The driver itself may have failed, or electrical connections may have corroded. No amount of water ejection fixes broken hardware components. Therefore, persistent total silence warrants immediate professional evaluation.
Distortion that worsens over time rather than improving indicates progressive corrosion. Water initially causes temporary problems, but extended exposure creates permanent damage. If audio quality degrades despite continued treatment, stop DIY efforts and consult professionals. Moreover, worsening symptoms suggest the treatment window for DIY success has closed.
Electrical burning smell accompanying water exposure signals critical problems. Water has caused short circuits affecting multiple internal components. Immediately power off your iPhone and don’t attempt further DIY treatment. Seek authorized service immediately because continuing to use the device risks catastrophic failure. Consequently, unusual odors always indicate urgent professional intervention is necessary.
Repair Cost Considerations
Apple charges $149-$399 for out-of-warranty water damage repair depending on your iPhone model. These prices cover speaker replacement and moisture damage cleanup. If water damaged additional components like the logic board or battery, costs can exceed $500.
AppleCare+ with accidental damage coverage reduces costs to $99 per incident. However, this requires having purchased AppleCare+ before the water damage occurred. You can’t add AppleCare+ retroactively after damage happens. Therefore, considering AppleCare+ during iPhone purchase is wise for accident-prone users.
Compare these expenses to waterejectsound.com’s cost—absolutely zero. The financial motivation for attempting DIY water ejection first is overwhelming. Even if DIY treatment has only 80% success rate, trying it first before expensive repairs makes economic sense. Moreover, successful DIY treatment preserves your AppleCare+ incident allowance for true emergencies.
Comparing Water Eject Methods
Multiple water ejection methods exist, each with distinct advantages and limitations. Understanding these differences helps you choose the best approach for your situation.
Web-Based Tools vs. Shortcuts
Waterejectsound.com requires zero setup time. Simply visit the URL and start treatment immediately. Shortcuts require 15-30 minutes of initial configuration including finding audio files and building the shortcut. During emergencies, this time difference matters significantly.
Web tools work on any iOS version. Shortcuts require iOS 14 or later. Older iPhones can’t use shortcuts at all. Additionally, web tools receive automatic updates ensuring optimal frequencies. Shortcuts require manual updating when better audio files become available. Therefore, web tools offer superior convenience and compatibility.
However, shortcuts offer offline functionality. Once configured, they work without internet connection. This benefit matters for users frequently in areas without WiFi or cellular data. For the majority of users with consistent connectivity, web tools provide better overall value. Consequently, bookmark waterejectsound.com as your primary method and consider shortcuts only if offline capability is essential.
Professional Service vs. DIY
DIY water ejection through waterejectsound.com costs nothing and works in minutes. Professional repair costs $100-$400 and takes 3-7 days including shipping or appointment scheduling. The time and cost differences are dramatic.
Success rates favor DIY for recent water exposure. When treated within the first hour, DIY methods succeed 85-90% of the time. Waiting days for professional service allows corrosion to begin, reducing recovery chances. Therefore, immediate DIY treatment provides better outcomes than delayed professional service for fresh water exposure.
Professional service becomes necessary only when DIY fails after 72 hours of attempts. At that point, internal damage has likely occurred requiring component replacement. Understanding this progression helps you allocate time appropriately—try DIY first, escalate to professionals only if needed.
The Science Behind Sound-Based Water Ejection
Understanding the physics explains why specific methods work while others fail. Scientific knowledge helps you make informed treatment decisions.
Acoustic Resonance Principles
Every object has natural resonant frequencies where it vibrates most efficiently. Speaker membranes resonate strongly between 165Hz and 400Hz for smartphone-sized drivers. When sound matches these frequencies, the membrane oscillates with maximum amplitude.
Maximum amplitude creates maximum force on water droplets adhering to the speaker. This intense vibration overcomes surface tension holding water to the mesh and membrane. Subsequently, the rapid oscillation propels water droplets outward through the speaker grille. Therefore, frequency matching determines water ejection effectiveness.
Random audio files don’t optimize for these resonant frequencies. Music, white noise, or arbitrary tones might partially work through coincidence, but they lack systematic frequency targeting. Waterejectsound.com employs engineered frequency sweeps that systematically address the entire effective range. Consequently, scientific acoustic design produces dramatically better results than random audio.
Surface Tension and Droplet Dynamics
Water molecules bond strongly to each other through hydrogen bonding. This molecular attraction creates surface tension that makes water behave like an elastic skin. Surface tension is why water forms droplets rather than spreading infinitely thin.
Breaking surface tension requires applying force greater than the molecular attraction. The vibration force must overcome this threshold to separate water from surfaces it’s adhering to. Lower vibration amplitudes fail to break surface tension. Higher amplitudes successfully dislodge water droplets. Therefore, maximum volume settings are essential for generating threshold-breaking vibration forces.
Different droplet sizes require different approaches. Large droplets need sustained low-frequency vibration. Small droplets respond better to rapid high-frequency oscillation. Multi-frequency approaches like waterejectsound.com addresses all droplet sizes comprehensively. Consequently, frequency diversity explains why professional tools outperform single-tone solutions.
Your iPhone speakers can survive water exposure completely when you respond quickly with effective methods. Visit waterejectsound.com immediately when your iPhone gets wet. This free online tool uses scientifically proven acoustic frequencies optimized specifically for iPhone speakers.
Don’t waste precious time with ineffective methods like rice, heat, or waiting passively. Bookmark waterejectsound.com right now so it’s ready when you need it. Most water exposure cases resolve completely within 3-4 one-minute cycles when treated promptly. Your iPhone will sound as clear as new, and you’ll avoid hundreds of dollars in repair costs.
Remember that prevention beats cure every time. Implement monthly preventive cleaning, protect your iPhone during high-risk activities, and respond immediately to any water exposure. These simple habits ensure your iPhone speakers maintain perfect audio quality for years. Take action now to protect your investment—your future self will thank you when your iPhone survives that inevitable water accident.
Frequently Asked Questions
How do I eject water from my iPhone speakers quickly?
Visit waterejectsound.com from Safari, set volume to maximum, and hold your iPhone with the speaker facing downward at 45 degrees. Tap play and let the 60-second cycle complete. You’ll see water droplets emerge within 30 seconds. Repeat 3-4 times for each speaker location (bottom and top earpiece). This method works for all iPhone models from iPhone 7 through iPhone 15 and requires no app downloads or shortcut configuration. The scientifically calibrated frequencies create optimal speaker vibration that dislodges trapped water more effectively than any other method.
Can I use Siri Shortcuts to eject water from iPhone speakers?
Yes, but waterejectsound.com works better and faster. Shortcuts require iOS 14+, take 15-30 minutes to configure, and need you to find appropriate audio files. The web tool works instantly on any iOS version with zero setup. Additionally, waterejectsound.com uses multiple optimized frequencies in sequence, while shortcuts typically play single audio files. For convenience and effectiveness, bookmark waterejectsound.com. You can still say “Hey Siri, open waterejectsound.com” for voice-activated access without the hassle of creating custom shortcuts.
Will water damage my iPhone speakers permanently?
Most water exposure doesn’t cause permanent damage if treated within 24 hours. iPhone 13 and newer models have IP68 water resistance, but speakers can still trap moisture. Using waterejectsound.com within the first hour gives you 85-90% success rate for complete recovery. Wait 24 hours before charging to prevent short circuits. If audio quality doesn’t improve after 72 hours of treatment, internal speaker components may be damaged and require professional replacement. Therefore, quick response is critical—treat water exposure immediately for best results.
How often should I clean my iPhone speakers with water eject?
Use waterejectsound.com immediately after any water exposure from rain, sweat, spills, or swimming. For preventive maintenance, run monthly cleaning cycles even without obvious moisture. This removes accumulated humidity and microscopic condensation before it causes problems. Gym users should clean after every workout because sweat contains corrosive salt. People in humid climates benefit from bi-weekly cleaning during summer months. Regular maintenance extends speaker lifespan significantly and maintains optimal audio quality throughout your iPhone’s life.